In my table top game, the players have stumbled on an island that is inhabited by a primitive, tribal group of humans. Trying to find their way home, they have been directed to a temple of the local deity Asten, which is a library guarded by a monstrous lion. Because I am publishing this now, before the players get there, I can’t say any more for fear of spoilers. But, I needed the library.
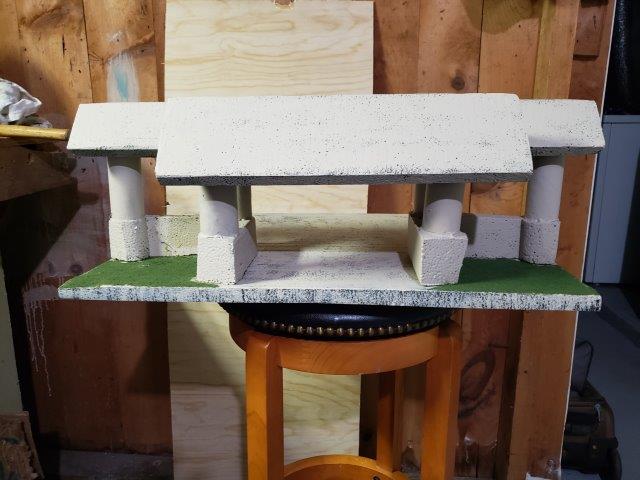
Most of the island is crafted on quasi-Egyptian themes. The landscape is mostly sandstone, sparse grasses, very few trees, deeply irrigated rivers, and the like. This had been established last game when they were given shelter in a rounded, domed building made of crude stones stacked on one another. The library was going to have a similar feel, although most austere. There would be columns, and a removal roof so that I could display it before they go in, but still be able to move their minis around the board as necessary.
Thinking that the adventure on this island would only take one session, I crafted some crude colonnades which would serve as my library when needed, but because of player actions (they accidentally brought a poisonous creature to the island and had to deal with that first) this has become a two-session mini-adventure. This gave me more time to make a proper set piece for this game.
Basic materials:
- Various pieces of styrofoam packing material, some cut to specification using a hand saw.
- Toilet paper tubes
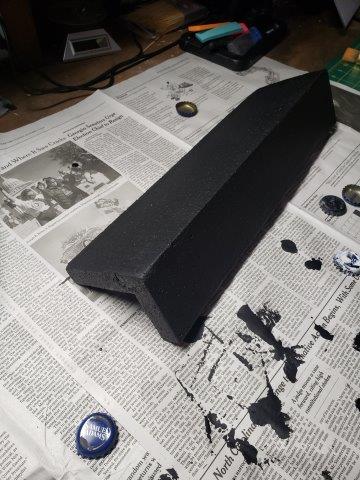
- Flat black acrylic base coat, mixed 50-50 with Modge Podge
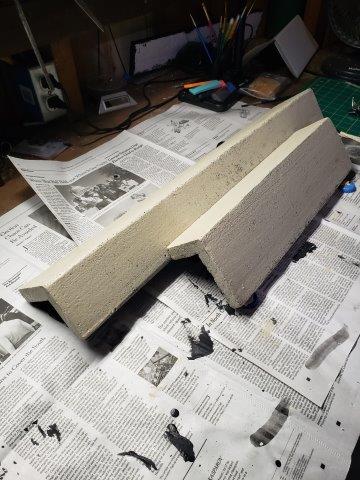
- Desert Sand paint (Reaper Master Series)
- Hot glue
- White glue + water, 50-50
- Toothpicks
- Grass fletching (you can find this at craft stores, normally for model train terrain)
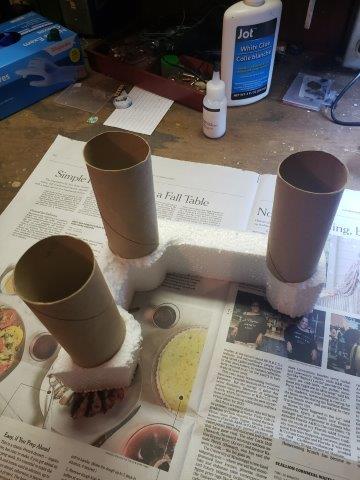
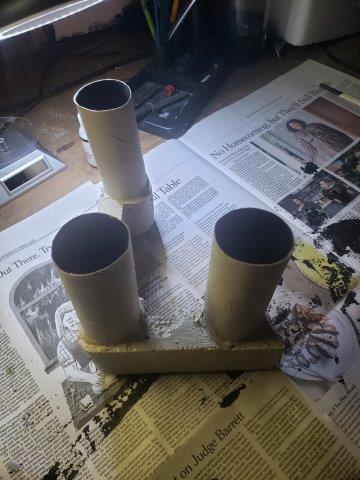
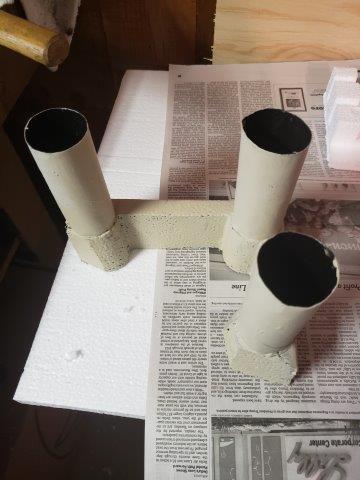
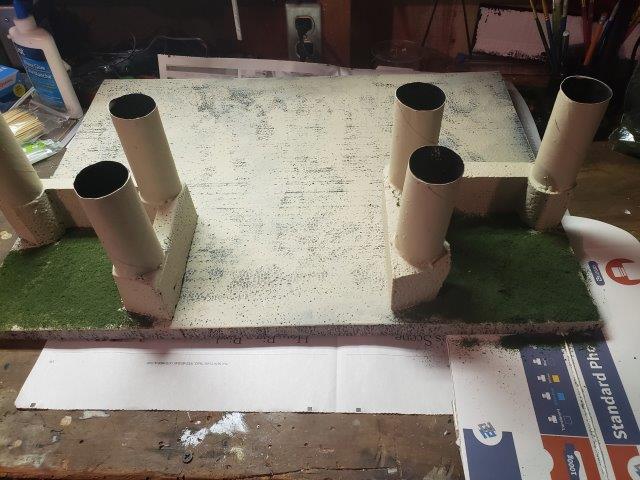
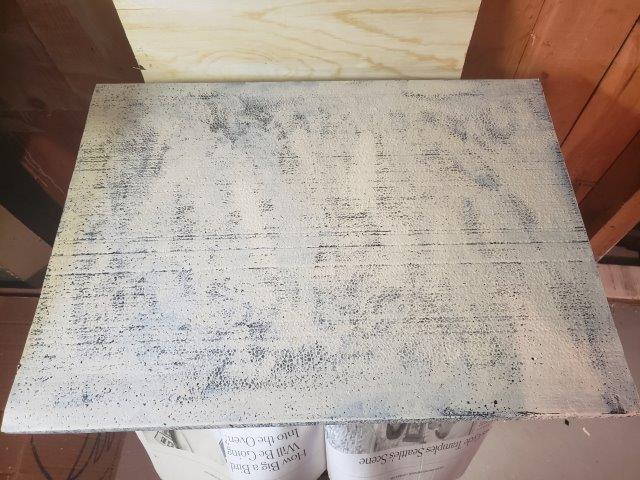
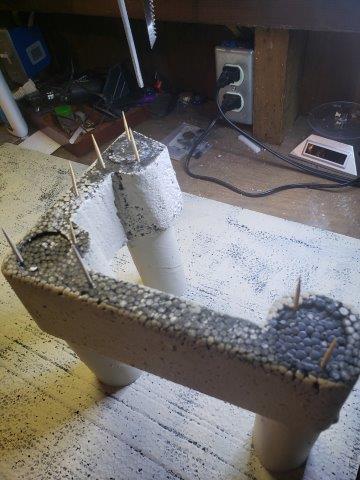
The first thing that I needed to do was paint what would be the floor of this temple. While this was pretty straight forward, securing the colonnades to the base was more of a challenge than I expected. Neither hot glue nor white glue really held tightly, and that was because the styrofoam on the colonnades was not perfectly square, nor is the styro sheet of the base. So, I used toothpicks as interior pegs and just secured them to the base which held fine. I added some of the rough looking grass that they had seen previously to the bends in the columns.


When it came to the removable roof for the front part of the temple, I went through several different designs. First, I just had a flat piece, but I wasn’t particularly happy with that. I started experimenting with angled roof ideas, and finally settled on a two-peak setup.
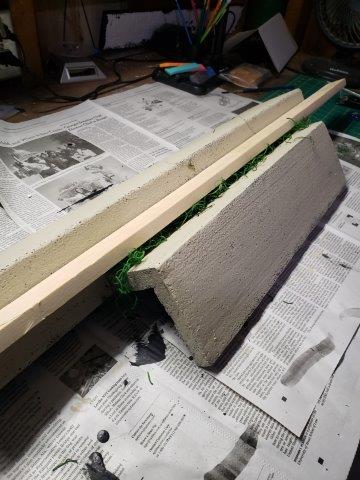
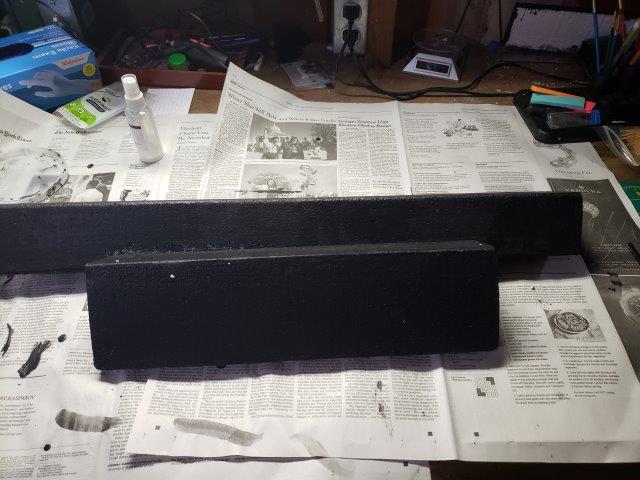


You will see in the second picture that I had the thought of adding some vines to the valley between the two pitched roof sections. It was surprisingly difficult to get good adhesion, even when I weighed the vines down some. Ultimately, I decided against it and just went with the roof sections themselves.
Some observations. For one, I really should have used a less expensive “tan” acrylic. The Reaper paints, while great, were the wrong tool. I didn’t realize it until I went to go paint the last roof section, and realized I had gone through four bottles already, and was going to need a fifth. One Point Five, the base modge-podge + black prime really makes it pop and look nice. Hat tip to Black Magic Craft. Two, I am glad that I kept experimenting with the roof until I was happy with it, and I am glad that I made it removable. Three, I am still confounded by the “vine” material I have, it just routinely sucks to attach it to anything, and I don’t know if it is me or the material. Four, the grass fletching worked much better when the glue was “painted” on with a sponge brush, rather than the spray bottle they provided.
Tell me what you think, am I missing anything?
